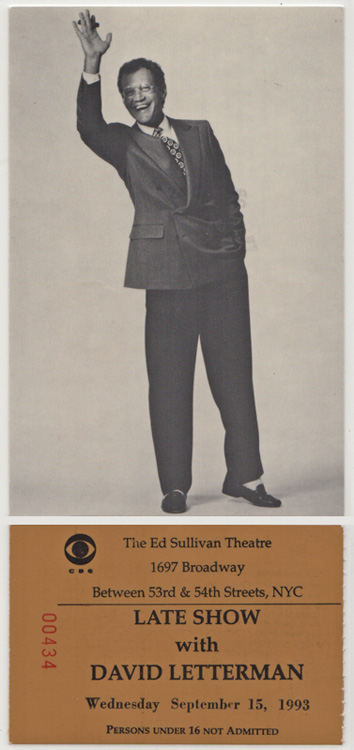
Late Night with David Letterman premiered in 1982 and was a staple of my tv viewing during my formative years (ages 17 on up).
When I first moved out to New Jersey to go to the Kubert School, one of the first priorities was to get on the waiting list for tickets to a taping of Letterman.
When I eventually did get tickets, it was a show featuring Jerry Garcia & Bobby Weir from the Grateful Dead. Going to 30 Rockefeller Plaza in New York City to see the taping was one of those memories that stay with you. The lobby at 30 Rock was filled with Dead Heads offering hundreds of dollars for anyone wishing to sell their tickets. (The tickets were free). Having waited so long to get the tickets, selling them never crossed my mind.
When Letterman eventually moved to CBS and the Ed Sullivan Theater I mailed in a request to be put on the waiting list again. The Late Show with David Letterman debuted August 30, 1993, and I was able to get tickets within the first few weeks of it’s premiere.
Having been passed over to host the Tonight Show in favor of Jay Leno, Letterman’s move to CBS with his own show was monumental and every show those first few weeks Letterman got a standing ovation. The show I attended was no exception. Coincidentally Jerry Garcia from the Grateful Dead was on the show that night as well, playing with Paul Shaffer and “The World’s Most Dangerous Band.”
Initially Letterman’s Late Show beat out the Tonight Show with Jay Leno in the ratings, but eventually the ratings slipped and Letterman was behind Leno and Ted Koppel’s Nightline in the ratings. Right in view of the Ed Sullivan theater a billboard went up in Times Square proclaiming Leno as number one.
Letterman followed up brilliantly with the following…
One of the things that made Letterman so great was that he had on guests no one else knew how to handle (Howard Stern, Andy Kaufman and Richard Simmons come to mind), and though sometimes there was a danger of the segment jumping the rails, Letterman always kept it on track and made it memorable.
And then of course there were guests that no one else would have had on.
Like underground comics creator Harvey Pekar…
Letterman was the gold standard as far as talk show hosts go in my book.
Norm MacDonald (at the end of this stand-up clip) has summed it up better than anyone else, so I’ve leaving with the following…

For more Letterman clips, check out…
Variety – Top Ten Moments from the ‘Late Show With David Letterman
Rolling Stone: Letterman, Seriously: Dave’s 10 Most Profound Moments


